Fake nails — whether acrylic, hard gel, or dip powder — look great, but removing them can be a nightmare. Many people try to peel or pry them off, which tears their natural nails. Others soak in acetone for an hour and still struggle with residue.
There is a faster, gentler way: using nail bits with an electric nail file (e-file). When used correctly, nail bits remove artificial nails without damaging your real nails. This guide explains how to do it safely, step by step.
What Are Nail Bits?
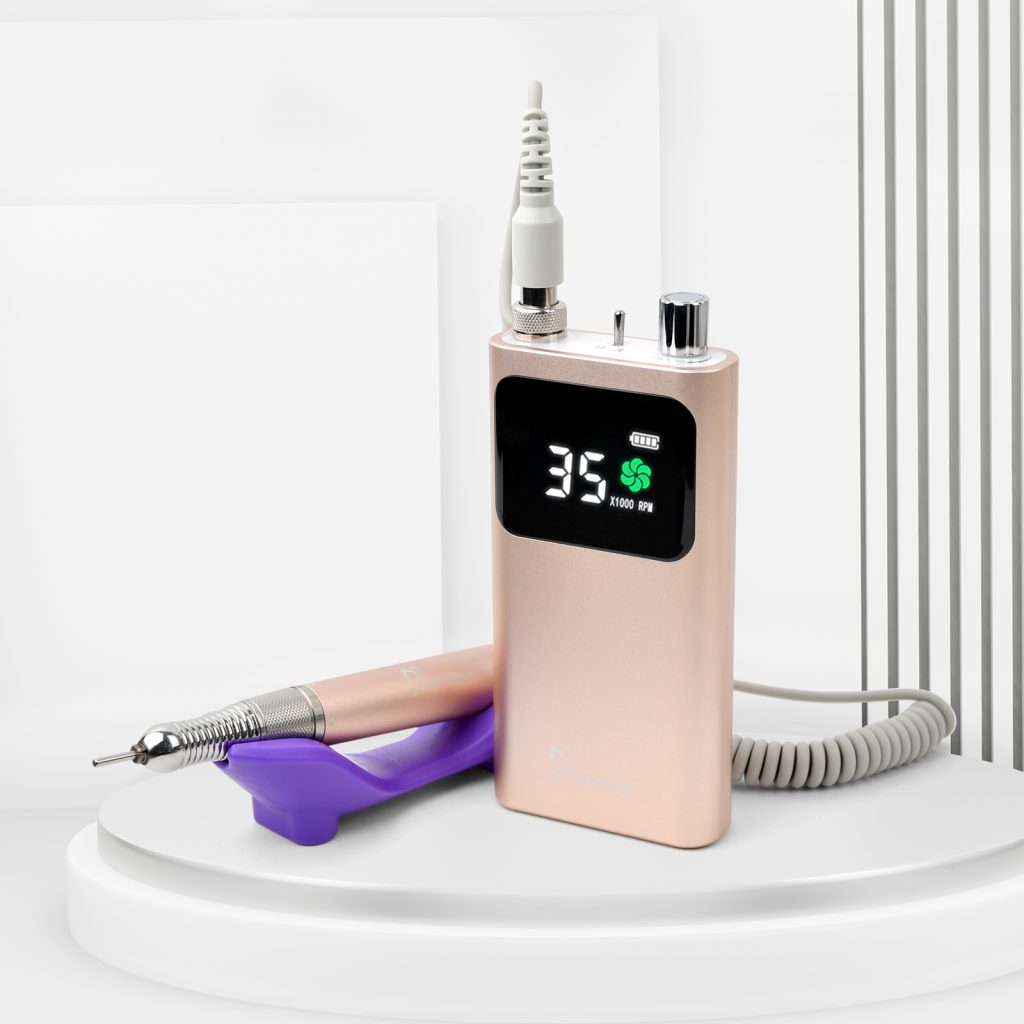
Nail bits are small attachments for an electric nail drill. They come in different shapes, materials, and grits. For removing fake nails, you only need a few basic bits:
- Ceramic or carbide coarse bit – For bulk removal of acrylic or hard gel.
- Mini sanding band – For smoothing and removing thin layers.
- Safety bit (sometimes called a “pumice” or “delicate” bit) – Gentle on natural nails, great for final clean-up.
Do not use diamond bits for removal — they are designed for cuticle work and can overheat or cut natural nails too aggressively.
Why Use Nail Bits Instead of Soaking Alone?
Soaking fake nails in acetone works, but it takes a long time. It also dries out your skin and nails. Worse, many people get impatient and start picking at half-dissolved nails, which often leads to peeling off layers of the natural nail.
Nail bits let you mechanically file away the fake product. You control the pressure and speed. The natural nail underneath stays intact because you stop as soon as you reach it. For professional nail techs, bits are the standard method — and you can learn it at home.
Safety First: 5 Rules You Must Follow
Before you pick up an e-file, remember these rules. Breaking them can cause burns, grooves, or even bleeding.
1. Use low speed – Keep your e-file between 5,000 and 10,000 RPM for removal. High speed creates heat and removes too fast.
2. Never apply pressure – Let the bit do the work. Light, feathery touches are enough.
3. Keep the bit moving – Do not stay in one spot for more than a second. Circling or sweeping motions prevent heat buildup and grooves.
4. Stop when you see natural nail texture – The natural nail has a matte, slightly grainy look. Fake nails are smooth and shiny. As soon as you see matte, stop.
5. Wear protective gear – Use a dust mask (acrylic dust is harmful to lungs) and safety glasses.
Step-by-Step Guide to Removing Fake Nails with Bits
Gather your tools: e-file, coarse ceramic bit, fine sanding band, dust brush, and a 180-grit hand file for finishing.
Step 1: Shorten the fake nails
Use nail clippers to cut the fake nails as short as possible without exposing your natural nail tip. Shorter nails mean less filing.
Step 2: Start with the coarse bit
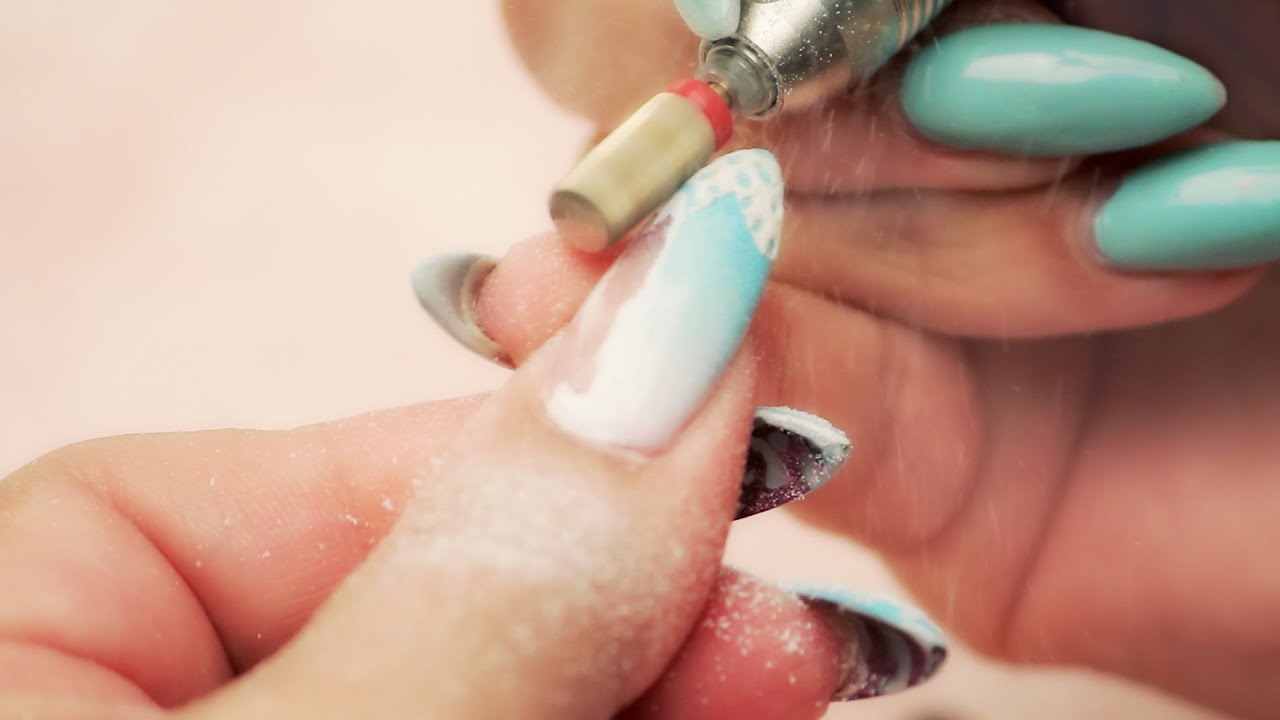
Attach your coarse ceramic or carbide bit. Turn the e-file on to a low-medium speed (around 8,000 RPM). Hold the bit almost flat against the nail surface — not at a steep angle.
Using light, sweeping motions, file away the top layer of the fake nail. Work from the cuticle area toward the free edge. Do not dig into one spot. Keep the bit moving in small circles or back-and-forth strokes.
Step 3: Remove most of the product
Continue until about 90% of the fake nail is gone. You should see a thin, cloudy layer remaining. At this point, you might feel the bit gripping differently — that means you are close to the natural nail.
Step 4: Switch to a fine sanding band
Change to a medium or fine sanding band (180–240 grit). Lower your speed to 5,000–7,000 RPM. Gently buff away the last thin layer of fake product. The sanding band is less aggressive and reduces the risk of scratching your real nail.

Step 5: Check your progress
Wipe away dust with a brush. Examine each nail. Natural nails look matte and have faint vertical ridges. If you still see shiny patches, that is remaining fake product — go over those areas lightly with the sanding band.
Step 6: Final smoothing with a hand file
Put away the e-file. Use a 180-grit hand file to gently smooth the surface of your natural nails. This removes any microscopic unevenness left by the bit. Do not over-file — two light passes per nail are enough.
Step 7: Hydrate and care
Wash your hands to remove dust. Apply cuticle oil and a rich hand cream. Your natural nails may feel thinner than usual — that is normal after wearing fake nails. Give them a break for at least a week before applying new artificial nails.
Common Mistakes to Avoid
- Using too much pressure – This creates heat and deep grooves. If your nail feels hot, stop immediately.
- Keeping the bit in one spot – This burns the nail plate and causes divots.
- Using a coarse bit on natural nails – Never touch your bare natural nail with a coarse carbide or ceramic bit. That is what the fine sanding band is for.
- Skipping the dust mask – Acrylic and gel dust is not harmless. Protect your lungs.
When to Soak Instead
Some fake nails — like certain soak-off gels or dip powders — are designed to dissolve in acetone. For those, filing might be slower than soaking. If your product packaging says “soak-off gel,” you can still use bits to remove the top layer, then soak off the rest. But for hard gels and acrylics, bits are the best method.
Final Words
Using nail bits to remove fake nails takes a little practice, but it is a skill anyone can learn. Start slow, keep your speed low, and never force the bit. Your natural nails will thank you — no peeling, no thinning, and no pain.
Once you master safe removal, you can change your fake nails in 20 minutes instead of an hour. That means more time enjoying beautiful nails and less time struggling with removal.
Read also: Pamper Your Foundation: A Guide to Foot Care Essentials